
This Wooden Mechanical Clock Kit lets you build a clock without all of that fancy casing around it. Build your own clock and then display it and use it to keep the time while impressing your friends.
It uses a pendulum and weight to keep time. It is totally classy and you get the satisfaction of building it yourself.
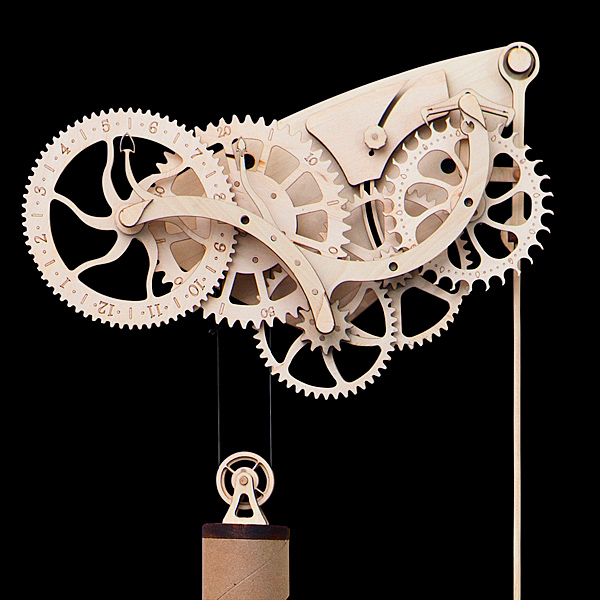

Wooden Mechanical Clock Kit
- Build an awesome, fully-functional, wooden pendulum clock
- And it even tells time (with two fixed hands pointing to wheels that correspond to the hour and minute)
- This is a clock that you will need to wind up
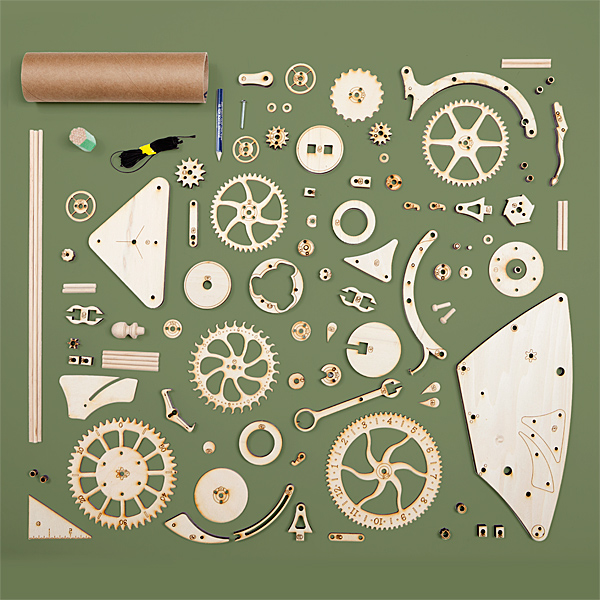
- Skill Level: Advanced
- Includes: Over 100 parts, pencil, sandpaper, fully-illustrated instructions (including mounting template)
- Supplies Needed: Glue, Razor Saw, Counterweight Material (BBs, metal shot, fishing weights, etc.), Patience
- Completed Dimensions: approx. 13″ x 9″ x 3″ with a 51″ pendulum
Only $69.99 from ThinkGeek.com.
6 Comments
l bought this clock ,followed the instructions very carefully hung it on my wall and it never worked. Now it’s just a wall sculpture . . .
Disassembled the clock, put carbon on all the wheels and reassembled the clock
it still doesn’t work. Any good tips on how to get it working would be welcome ?
This clock can be very fussy, but I promise you, if you’re relentlessly patient and never give up it will run like a champ. Be creative. For example, I had to add extra weight to the pendulum arm (3 metal nuts – I experimented with different types through which I threaded the adjustment screw at the end of the pendulum). Also the weight MUST be filled as full as you can get it. I ran out of bb shot about 1/2 full so I filled the rest with coins I no longer use. It is critical the the weight be a full 5 lbs. it’ll seem excessive, but this baby needs a ton of weight to keep it going. Make very sure you sand all of the brown bits off every surface of the gear teeth. I did this and also gently beveled both sides of each gear face. Do NOT touch the escapement gear wheel with sandpaper. It’s easy to distort the shape of this gear’s teeth. I assembled all the gears in the frame without the pendulum attached and not yet hung. Then by hand I rotated the third gear which should make all the other gears turn. I made everything spin as fast as possible probably a thousand times. This helps the gears to mesh and smooth out the inner surfaces of the gear teeth. Be cautious with stain. Avoid putting it on gears. Gums them up. Watch for a couple of pitfalls. Although optimally the clock should be hung absolutely perpendicularly, I found that by hanging it just slightly off true it would make the clock go. It’s also useful for adjusting whether the clock runs fast or slow. The other two pitfalls actually are the hour hand contacting the hour idler gear on the face at the 6 o’clock position. Speaking of unwanted contact between the parts, make sure that none of the gear faces touch each other. Mine have about the width of a piece of paper separating them. One last pitfall: the winding mechanism. If you’re not cautious every single time you wind up the weight, the winding chord has a tendency to veer outside the winder and quickly wrap itself around the axle underneath the winder. In short order this will stop your clock dead and it cannot be budged. Unwrap the chord from the axle, wind it up properly, reassemble and try again. Finally, yes there a LOT of this that can go wrong, finally just keep at it. If it stops, take it apart and sand those gears with 220 grit sandpaper. So in order of importance: clean, smoothly sanded gear teeth (except escapement), experiment with perpendicularly, no contact between gears, fill the weight case completely full with shot. Hand run the gears over and over and over again. Keep trying. It will work.
how to buy this clock ?
Hello
good day
I am from Iran and I cannot pay. Is there a way to have a clock plan?
I do manual labor with a saw.
Pourriez vous me donner les informations pour achat
Merci